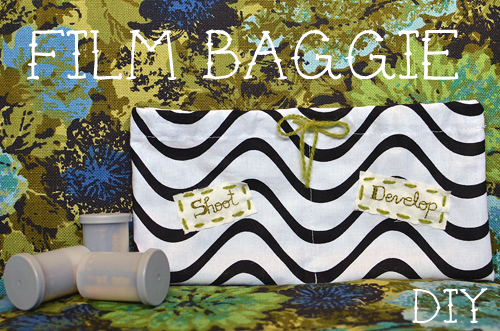
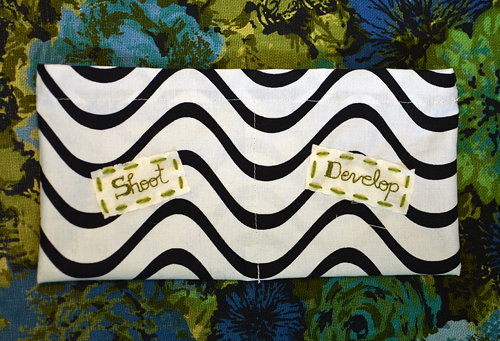
I don't really love the word "baggie" but it was the working title of this project and I couldn't think of anything else to call them. Pouch...pouch would have been good.
Regardless of what this is called, I thought it would be a cute way to carry used and unused film around in your purse. Another idea is to use one side for regular film and the other side for Instax mini film. If you would like to make one for yourself you will need:
- cute fabric (you could even use an unwanted piece of clothing for the fabric!)
- 2 small pieces of fabric for embroidering on
- embroidery thread
- yarn or ribbon
- sewing needle and thicker yarn needle
- straight pins
- iron
- sewing machine
Let's get started!
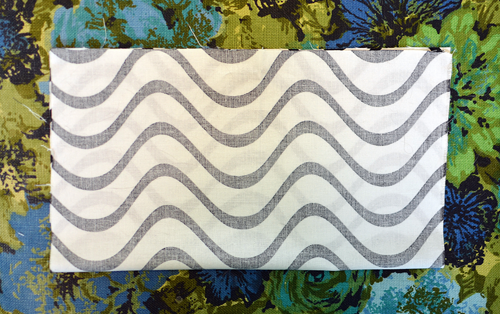
1. Cut a piece of fabric that is 11.5" by 12.5".
2. Fold with right sides together. You are folding the longer (12.5") side so that the top edge measures 11.5".
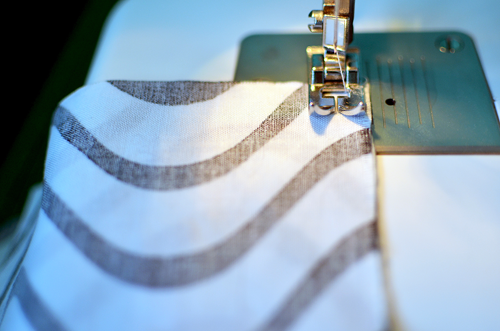
3. Keeping right sides together, sew down both sides of your fabric.
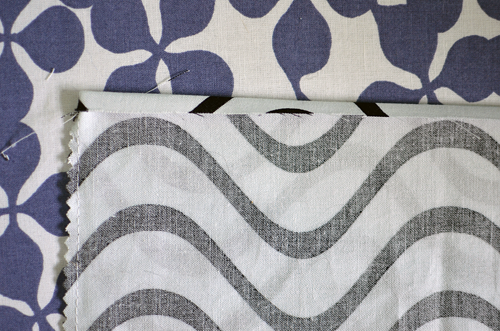
4. Use pinking shears to cut the raw edges of the seams you just sewed.
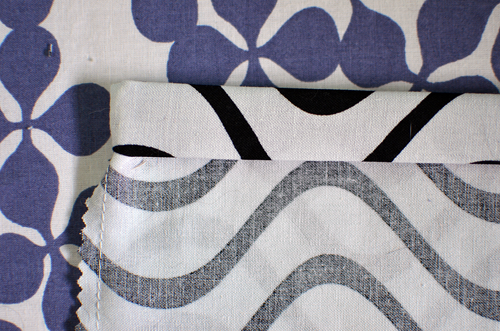
5. Keeping your pouch inside out, turn down a small hem and iron. It doesn't need to be exact, but around 0.25" is good.
6. Turn down another, larger hem (around 0.75" is what I did) and iron. This tucks in your raw edge and hides it from view.
7. Sew along the bottom edge of your hem. This creates a little tunnel at the top of your pouch that we will put a drawstring through later.
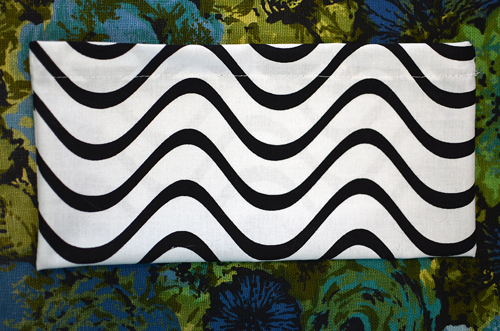
8. Turn your pouch right side out. Take a moment to pat yourself on the back for making it this far.
9. Next you are going to sew a line down the centre of your pouch starting at the line of stitching across the top. Meaning that above the stitch line will not be attached together while the bottom of your pouch will be divided into two sections.
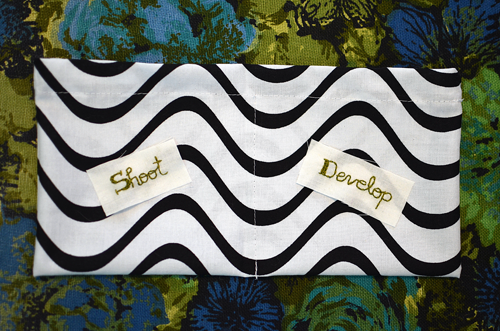
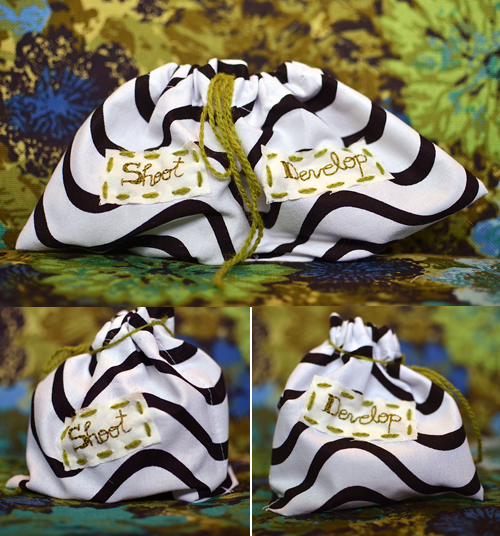
10. Get out your embroidery thread and embroider yourself some labels that say "shoot" and "develop" or "instax" and "35mm" or whatever the heck you would like them to say. I embroidered my labels onto different pieces of fabric that I will sew on in the next step. Place your labels where you would like them to go and pin them down.
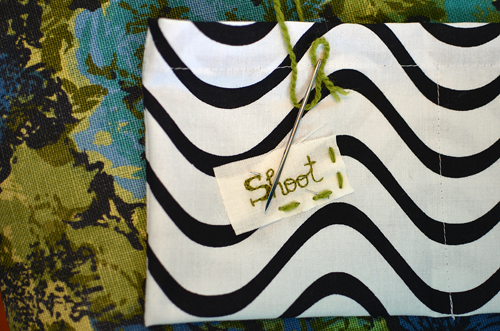
11. Stitch your labels on! I used a thin yarn and a yarn needle but you could also use embroidery thread and a regular needle.
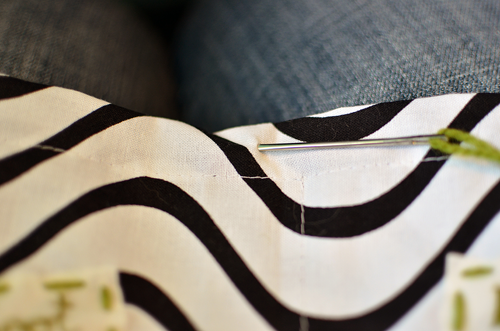
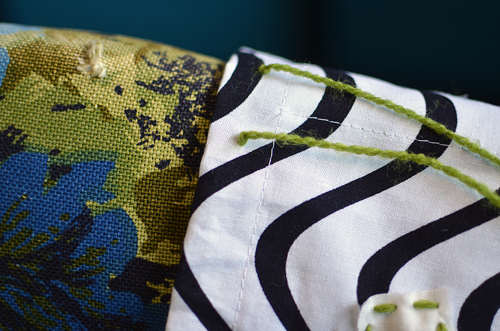
12. Next we are going to add a drawstring. I used yarn threaded on a yarn needle again but you could use ribbon and put little slices in your fabric to feed it through. Insert the needle a little off from the centre front of your pouch. Carefully feed your needle through your tunnel and out the other side.
13. Tie little knots in your yarn right beside the holes so that your drawstring doesn't disappear into the tunnel.
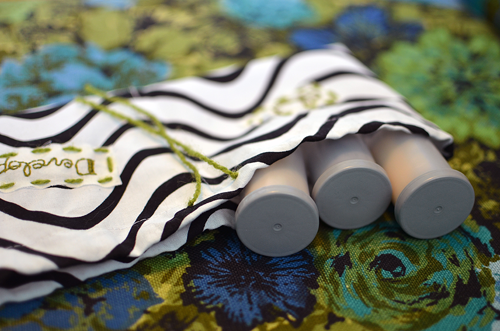
You are all done! Put some film in your pouch and I will show you how to tie it up compactly.
Pull your drawstring and tie a knot. Then fold your pouch in half along the centre stitch line. Now you can wrap your drawstring around the top of the pouch and tie a bow.
I hope you found this idea handy! Let me know if you make one for yourself. I actually made this one as a gift so I will be making another one for myself soon!
♥elycia


what a wonderful idea!!!
ReplyDeletegreat tutorial...thanks for sharing!!!
liebgruss from germany
eni
This is an amazing idea!! Super cute.
ReplyDeleteFantastic idea! I am always grabbing a roll to shoot with only to find out I have already used it and am out of new rolls :( This is a definite for my to-do list!
ReplyDeleteThanks Elycia!!
Luvluv x
BEST IDEA EVER. Oh my gosh, so many times I am trying to figure out if a roll is new or used. This is the perfect solution! Thanks! I am definitely going to try to make one!
ReplyDeleteI love this! And it's so simple, definitely want to try this - if not for film then for SOMETHING at least!
ReplyDeletexo
http://kittysnooks.blogspot.com/
You so crafty. ;) This is a really great idea!! (And I love that fabric)
ReplyDeleteOhhh, awesome! I've been using coin purses to hold my 120 film, but I think this would work better, especially if a dark colored liner was added.
ReplyDelete<3!
This is a really cute idea. I could see this being useful for lots of things. Thanks for the tutorial!
ReplyDeleteThis would be a great idea for a clean clothes/dirty Clothes to go bag for a baby. Hmmmm, I'll do it!
ReplyDeletehttp://powkomomdiaries.blogspot.com/
What a cute idea! I don't often use film enough to make these but they are so darn cute I might just have to start :)
ReplyDeletei think you've just revolutionized the word 'baggie' my dear :) This is an ever-so-cute project and i love it because it is for roles of film, something that seems so archaic in today's digital world (like VHS movies, eghads!) I miss the notion of waiting to have a role of film developed, so this has inspired me... thank-you! Plus, i'm pretty sure i have the exact fabric of your backdrop :)
ReplyDeletethat is such a great idea, we have film all over the house and sometimes we get confused which is which! the pattern is great too!
ReplyDeletexo,
cb
i love this! i too hate the word baggie. it reminds me of something you bring along to clean dog poop. i would call it a caddy!
ReplyDeleteThis is such a good idea. I can think of a few things that this would work for.
ReplyDeletehttp://lovesmodesty.blogspot.com
Oh how cute! Great idea!
ReplyDeletexo Heather
http://ahopelessnotebook.blogspot.com/
Clever! Not sure I would carry this in my bag but there is nothing worse than finding a roll of film without a box or canister and having no idea what's on it/if it's been used/is it for double exposures etc. x
ReplyDeleteThose sure are handy but in this hellish weather we have I store all my film in the fridge :/
ReplyDeleteLove this: "pat yourself on the back for making it this far." Very cool DIY!
ReplyDelete♥ sécia
www.petiteinsanities.blogspot.com
This is such a cute idea! I would totally use these for my film.
ReplyDeleteGreat little tutorial :D so cute and handy.
ReplyDelete